
| Home • Reviews • Forums • News 2015 • 2013 • 2012 • 2009 • 2008 • 2007 • 2006 • 2005 • 2004 RSS Feeds • FOV Factor Table • Sensor Sizes | Definitions: A-D • E-H • I-L • M-P • Q-U • V-Z | Sitemap Articles • Archived Websites (Pre-DigitalDingus): D100 Lounge • E-10 Club | Contact |
| ColorVision Spyder2Pro by Datacolor |
|
| Monitor Calibration (Part 3) December 17, 2006 |
|
| Spyder2PRO Introduction • What's In The Box / Closer Look Spyder2PRO Monitor Calibration • Monitor Calibration (Part 2) • Monitor Calibration (Part 3) Spyder2PRO PrintFIX PLUS • Spyder2PRO Specifications • Spyder2PRO Conclusion
|
|

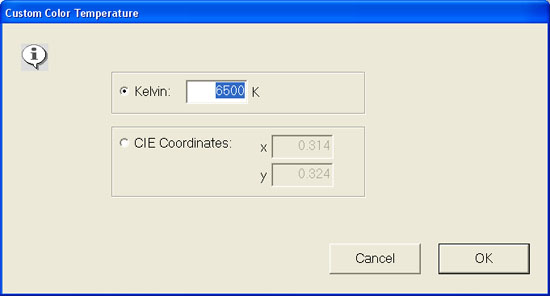
When you click on Other in the drop-down menu from the above screenshot, the following screen pops up. You can manually enter in your desired temperature, or even enter in your temps via CIE coordinates.
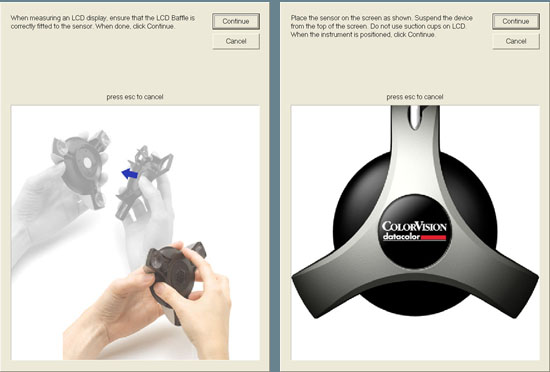
Now it's time to put your Spyder2PRO on your LCD monitor. The first screen informs you to put the LCD baffle on the device. The Spyder2PRO package that was shipped to me already had the baffle attached, so you may not have to do this step. After clicking Continue, the second screen will now display where to affix your Spyder2PRO.
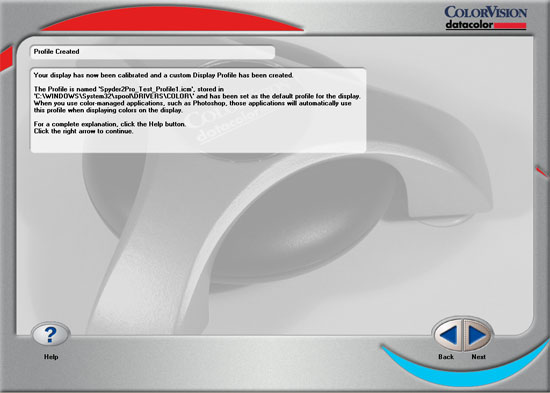
The Final Steps Once the cycle of displaying the color patches is complete on your LCD monitor, you then name your profile. The profile is then saved to your operating system's color reference folder. For XP users, it is located here: X:\WINDOWS\system32\spool\DRIVERS\COLOR\ This is also the place where you can delete other profiles which you can't seem to find but are conflicting with your software and hardware. Obviously, do not go tampering around in this folder unless you know what you're doing.
|
|
| Home • Reviews • Forums • News 2015 • 2013 • 2012 • 2009 • 2008 • 2007 • 2006 • 2005 • 2004 RSS Feeds • FOV Factor Table • Sensor Sizes | Definitions: A-D • E-H • I-L • M-P • Q-U • V-Z | Sitemap Articles • Archived Websites (Pre-DigitalDingus): D100 Lounge • E-10 Club | Contact |