
 |
| Home Ģ Reviews Ģ Forums Ģ News 2015 Ģ 2013 Ģ 2012 Ģ 2009 Ģ 2008 Ģ 2007 Ģ 2006 Ģ 2005 Ģ 2004 RSS Feeds Ģ FOV Factor Table Ģ Sensor Sizes | Definitions: A-D Ģ E-H Ģ I-L Ģ M-P Ģ Q-U Ģ V-Z | Sitemap Articles Ģ Archived Websites (Pre-DigitalDingus): D100 Lounge Ģ E-10 Club | Contact |
| Exposure by Alien Skin |
| Exposure \\ Color August 7, 2006 |
| Exposure Introduction Ģ Settings Ģ Preview Window Ģ Color Ģ Tone Focus Ģ Grain Ģ System Requirements Ģ Exposure Conclusion
|
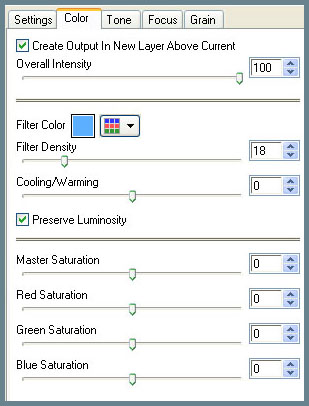
After choosing which type of film stock you prefer, the next tab is Color. The color tab allows you to adjust the film stock further. There are two different kinds of settings in the color tab depending on whether B&W Film or Color Film is selected at the start of Exposure. Exposure \\ Color (Color Film selection)
Filter Color As you can see on the left, there are several additional adjustments possible after the selection of a film type. One of the really convenient adjustments is the Filter Color selection. While still maintaining the same film type, you can select various colors for a different effect. The amount of colors selected is the same amount available within the Photoshop CS2 color palette (and in fact uses the PS CS2 color palette), so in other words, you have a virtually endless amount of color variation for the filter setting. Another added feature is the History drop-down menu so you can select previous colors. Filter Intensity The overall intensity of the filter color can be selected for quick adjustment. This determines (on a scale of 0 to 100) how much of the color is observed in the image. Cooling / Warming You can also "cool" or "warm" the look of the image as well. Saturation Levels In addition to warming and cooling an image, you have the option to increase or decrease the overall saturation levels. To take it one step further, you can adjust the RGB saturation levels individually. Exposure \\ Color (Black & White Film selection)
Using Ink 1 and Ink 2 levels, you can create a professional high contrast Black & White image and much more. Digital toning is also possible and is much easier to do here than it is in Photoshop.
|
 What's nice about Exposure is that it has the "feel" of Photoshop CS2 when you're editing and processing images. While I am personally not a professional photographer and consider myself a hobbyist who enjoys an interest in taking images, I still use Photoshop CS2 quite a bit, and found the layout was very non-threatening. I've experienced other programs who's plugins are so awkward, I find myself not using them as much as I would like to.
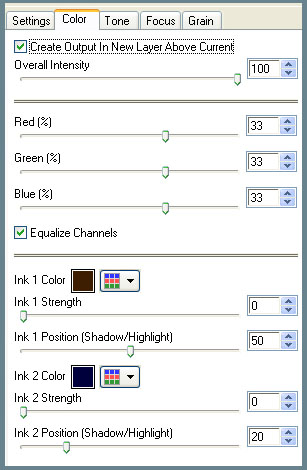 When selecting Black & White when starting Exposure, the color tab will reveal this layout versus the one above.
| Home Ģ Reviews Ģ Forums Ģ News 2015 Ģ 2013 Ģ 2012 Ģ 2009 Ģ 2008 Ģ 2007 Ģ 2006 Ģ 2005 Ģ 2004 RSS Feeds Ģ FOV Factor Table Ģ Sensor Sizes | Definitions: A-D Ģ E-H Ģ I-L Ģ M-P Ģ Q-U Ģ V-Z | Sitemap Articles Ģ Archived Websites (Pre-DigitalDingus): D100 Lounge Ģ E-10 Club | Contact |