
| Home • Reviews • Forums • News 2015 • 2013 • 2012 • 2009 • 2008 • 2007 • 2006 • 2005 • 2004 RSS Feeds • FOV Factor Table • Sensor Sizes | Definitions: A-D • E-H • I-L • M-P • Q-U • V-Z | Sitemap Articles • Archived Websites (Pre-DigitalDingus): D100 Lounge • E-10 Club | Contact |
| Macally PHR-250OTG (Using Fujitsu 80GB 2.5" 5400RPM 8MB Cache HDD) |
| Installing the Fujitsu MHV2080AH |
| Introduction | External Overview & Prep |
Removing The Back Cover | Installing the Fujitsu MHV2080AH Installing The Software & Drivers | Conclusion
|
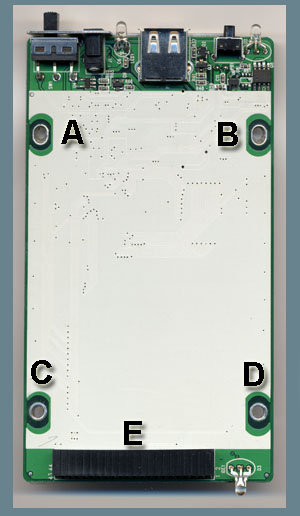
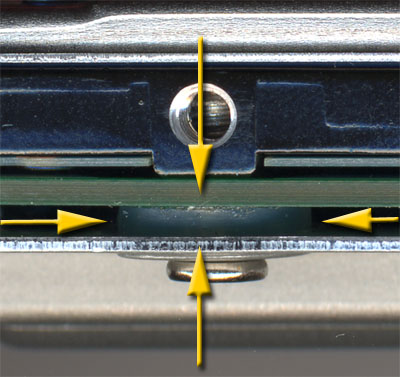
Descriptions Of The Support Plate A) Adjustable Hole for Screw #1 B) Adjustable Hole for Screw #2 C) Hole for Screw #3 D) Hole for Screw #4 E) 44-pin IDC receptacle for 2.5" HDD The 4 Holes Before attaching the 2.5" drive to your 250OTG, I recommend using the same small screwdriver you previously had to use, and push it through the 4 holes, each time turning the screwdriver clockwise and counter-clockwise, in order to expand the rubber cushions that are just underneath each hole. If your screwdriver is much smaller than the hole, or you have one that is much bigger and won't fit, find a screwdriver which will fit through the holes. You can see the "rubber cushion" below in a highly-magnified image:
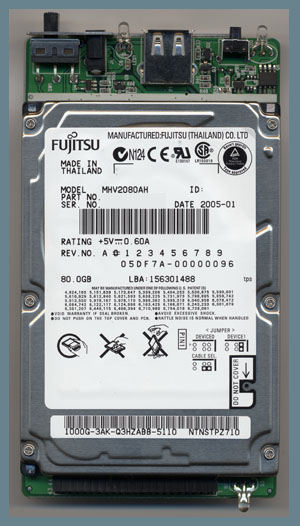
Now here is where things will get tricky. The holes must line up as close to perfect as possible for the screws to go through a) the Metal Plate, b) the Rubber Cushion, c) the Circuit Board, and finally d) the Hard Drive itself. Notice there are two slightly-oval holes at the "A" and "B" areas. This will allow a small amount of room for adjustment, because when you attach the drive to the plate, there will be a certain amount of "play" to position the drive. Be Sure The Pins Are Lined Up Be sure the pins on your drive are properly lined up with the receptacle. In the case of the Fujitsu MHV2080AH, there are extra pins, and there could be extra pins on other 2.5" drives, so be aware of this. Carefully slide the drive into the receptacle, making sure the pins are lined up. Gently give the drive a little nudge, just to be sure it's in there all the way. If it is, then you should not have a problem screwing in the two screws ("C" and "D" screw slots). If the screws can't seem to catch and screw in, just work the screw around in the hole a little. If you still can't get the screws in, then more than likely the drive is not pushed in far enough. Also, to verify you do have the holes lined up for screwing, use your small screwdriver and insert the screwdriver into the holes where the screws would go. If the screwdriver goes all the way through to the drive, then it's just a matter of working the screws in the holes to make them take hold.
|
| Home • Reviews • Forums • News 2015 • 2013 • 2012 • 2009 • 2008 • 2007 • 2006 • 2005 • 2004 RSS Feeds • FOV Factor Table • Sensor Sizes | Definitions: A-D • E-H • I-L • M-P • Q-U • V-Z | Sitemap Articles • Archived Websites (Pre-DigitalDingus): D100 Lounge • E-10 Club | Contact |