
| Home • Reviews • Forums • News 2015 • 2013 • 2012 • 2009 • 2008 • 2007 • 2006 • 2005 • 2004 RSS Feeds • FOV Factor Table • Sensor Sizes | Definitions: A-D • E-H • I-L • M-P • Q-U • V-Z | Sitemap Articles • Archived Websites (Pre-DigitalDingus): D100 Lounge • E-10 Club | Contact |
| Logitech Harmony 676 Digital Video Remote |
| Up Close: The Harmony 676 |
| Introduction | Installing The Software |
Setting Up The Remote | Up Close: The Harmony 676 | Conclusion
|
When you first hold the 676 in your hand, the grip of the remote will certainly come as a surprise. The special porous rubber-like coating covers more than half of the remote's body, ensuring there will not be any slipping when pressing buttons. Compact Size After owning a few universal remotes myself (one of them a Marantz RC2000), the 676 is much smaller than what you would normally expect. Usually, the upper and mid-bodies of the remote are somewhat "fat" with buttons, making the remote a little awkward to hold. However, this is not the case with the Harmony 676. Only the necessary buttons are used, which reduce the overall size of the body. LCD Viewing Size
Power Requirements 4-AAA batteries are required to power the remote. Your regular alkalines can be used, or what I recommend, NiMH rechargeables. The reason for the smaller battery size is to reduce the overall remote's dimensions, making it as compact as possible. Since we have installed the software and have downloaded the component settings, let's take a look at the remote itself. |
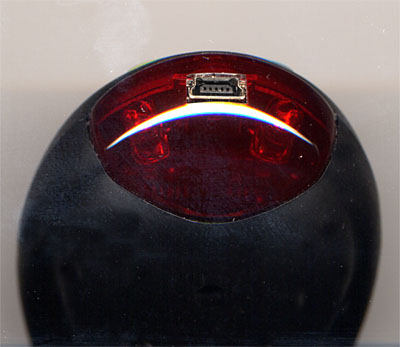
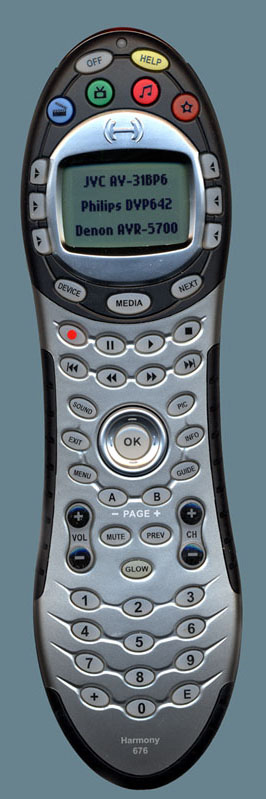 You can see the 3 components which I have input on the LCD screen. The 676 allows up to 15 devices, which should be more than enough for even the most seasoned audio or videophile. You can see the 3 components which I have input on the LCD screen. The 676 allows up to 15 devices, which should be more than enough for even the most seasoned audio or videophile."OFF" and "HELP" You can turn off all your components with the Off button, and Help is pressed if you experience problems with your activity buttons. Simple questions will be asked on the remote itself, so you don't have to go to the Harmony website unless necessary. Activity Buttons There are 4 Activity Buttons across the top of the LCD screen, enabling several transmissions of functions with just one button press. Device Select Buttons (3 left / 3 right) Components can be directly chosen by pressing the arrow buttons on the left or right of the device on the display. "DEVICE", "MEDIA", and "NEXT" The Device button allows you to use a specific component directly. The Media button enables you to view television shows, movies, and music from the remote itself. This is a free 2-Month trial. Next is for selecting the next "page" on the remote. I noticed there was no Prev on the remote for scrolling to previous device functions (although there is a Prev located on the lower part for a completely different action), which confused me a little, because scrolling forward when viewing your devices' functions, and not having a Previous selection, is a little annoying. Record, Stop, Play, etc. The 8 buttons below are your basic buttons used for a variety recording devices and players. Sound, Exit, Menu, Info, etc. These buttons located around the OK button are for specific features within your components themselves, such as your television's sound menu, or your receiver's sound menu. These buttons are very handy and are convenient when you don't want to scroll through your component's entire menu to get to a specific area (such as sound or picture adjustments). A / B, Page + / - This area can be used for customizing which speakers are used for particular audio needs. For example, you may want the back speakers (B) to only operate when you have movies playing, and you may want the front speakers (A) to only operate when you have music playing. These two buttons can also be used as another volume control or channel select control as well. It's all up to you on how you want the configuration. Volume, Channel, Mute, Prev, Glow These buttons are pretty much self-explanatory. The Prev button can be used for the previous television channel visited. 0 - 9, +, and E These buttons are basic as well, and would be used in conjunction with any operation requiring number inputs. Viewing The USB Connection & Transmitters
|
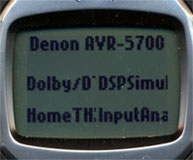 There are times when a larger LCD would be nice as the illustration shows. More than likely, you will encounter this type of situation when importing commands from your receiver. However, the text can be modified. For example, instead of having "Dolby Digital 5.1" on your remote--reduce the lettering so it says, "DD51". After owning several remotes for many years, I discover I only use a handful of selections from any one remote, and it's usually the power-related buttons. Speaker setups, channel levels, etc., are normally adjusted only once and then left for a very long time at the position. Usually, these rare occasions when these adjustments change, are when you move into another house or room.
| Home • Reviews • Forums • News 2015 • 2013 • 2012 • 2009 • 2008 • 2007 • 2006 • 2005 • 2004 RSS Feeds • FOV Factor Table • Sensor Sizes | Definitions: A-D • E-H • I-L • M-P • Q-U • V-Z | Sitemap Articles • Archived Websites (Pre-DigitalDingus): D100 Lounge • E-10 Club | Contact |