
 |
| Home Ģ Reviews Ģ Forums Ģ News 2015 Ģ 2013 Ģ 2012 Ģ 2009 Ģ 2008 Ģ 2007 Ģ 2006 Ģ 2005 Ģ 2004 RSS Feeds Ģ FOV Factor Table Ģ Sensor Sizes | Definitions: A-D Ģ E-H Ģ I-L Ģ M-P Ģ Q-U Ģ V-Z | Sitemap Articles Ģ Archived Websites (Pre-DigitalDingus): D100 Lounge Ģ E-10 Club | Contact |
| Image Doctor 2 by Alien Skin |
|
| Using Image Doctor 2 (Advanced) January 5, 2008 |
|
| Image Doctor 2: Introduction Ģ Image Doctor 2: Using ID2 Image Doctor 2: Using ID2 (Advanced) Ģ Image Doctor 2: Specifications Image Doctor 2: Conclusion
|
|
Removing Unwanted Objects: The Advanced Way
Let's now apply the above instructions to the following image.
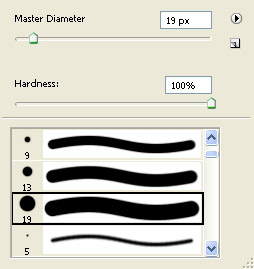
 Once the brush size and color are chosen, and you've created a new layer, apply a brush stroke over the area you want removed. Make sure you do this in the new layer. A brief word about selecting brush size. When you select a brush size, make sure it is a "hard" brush, meaning you only want the area the brush touches 100%, to be processed. Other brushes with various levels of "hardness" and "softness" will automatically expand outside the perceived area.
 Use the Magic Wand tool and place it in the area of the brush, and then clicking your mouse to create an active area which was brushed.
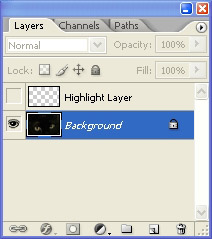
 In order for Image Doctor 2 to "see" the selected area we chose with Magic Wand, we have to "hide" the new layer we created. In this particular case, I named this layer "Highlighted Layer". Normally, this would say "Layer 1". We then click on the Photoshop Eye, which removes it from the layer. Removing the Photoshop Eye icon means we want this layer hidden.
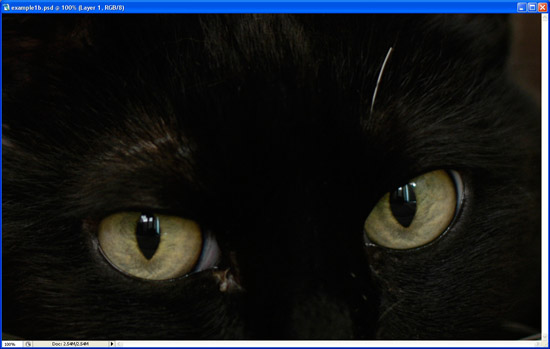
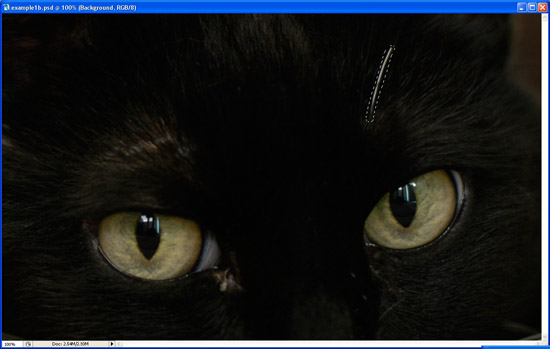
 Notice we now do not see our colored brush, but the area which we chose with the brush, is still intact and displayed over the little white whisker I want removed.
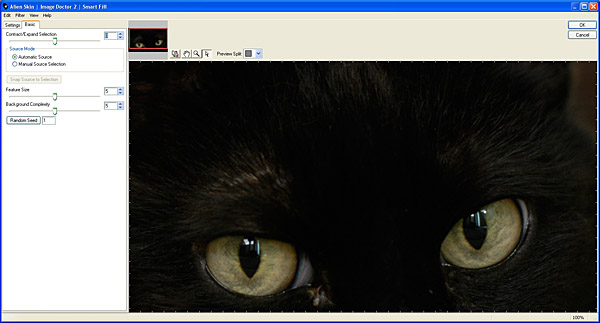
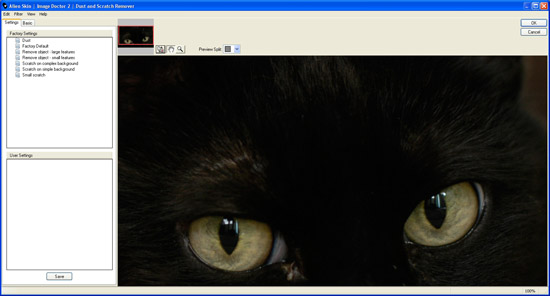
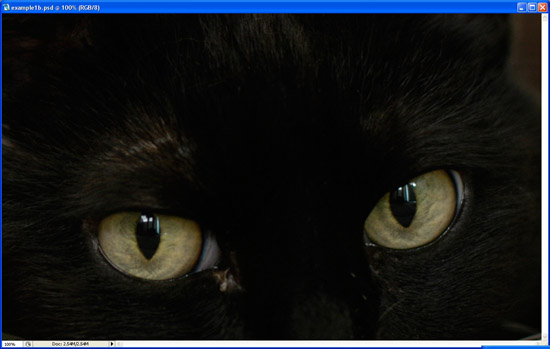
 Notice we now do not see our colored brush, but the area which we chose with the brush, is still intact and displayed over the little white whisker I want removed. Now, flatten the layer, and we can see Image Doctor 2 is available as a filter. Select "Smart Fill" and we get the following:
|
|
| Home Ģ Reviews Ģ Forums Ģ News 2015 Ģ 2013 Ģ 2012 Ģ 2009 Ģ 2008 Ģ 2007 Ģ 2006 Ģ 2005 Ģ 2004 RSS Feeds Ģ FOV Factor Table Ģ Sensor Sizes | Definitions: A-D Ģ E-H Ģ I-L Ģ M-P Ģ Q-U Ģ V-Z | Sitemap Articles Ģ Archived Websites (Pre-DigitalDingus): D100 Lounge Ģ E-10 Club | Contact |